⚙️ App Settings
Customizing Your App Settings

Your app settings define the core identity of your whitelabel platform — things like your domain, visual branding, and how emails are sent.
These settings apply globally across all products, so getting them right is key to delivering a seamless experience for your clients.
🔗 Connecting Your Custom Domain (CNAME Setup)
To use your own domain (like app.mydomain.com), follow these steps:
-
Go to your DNS provider (e.g., GoDaddy, Cloudflare, Namecheap).
-
Create a CNAME record pointing your subdomain to our platform:
app.yourbrand.com → cname.answerly.io -
In your dashboard, go to App Settings > Hostname and enter your domain.
-
Hit Save settings — once DNS propagates (usually within a few minutes), your dashboard will be live on your domain.
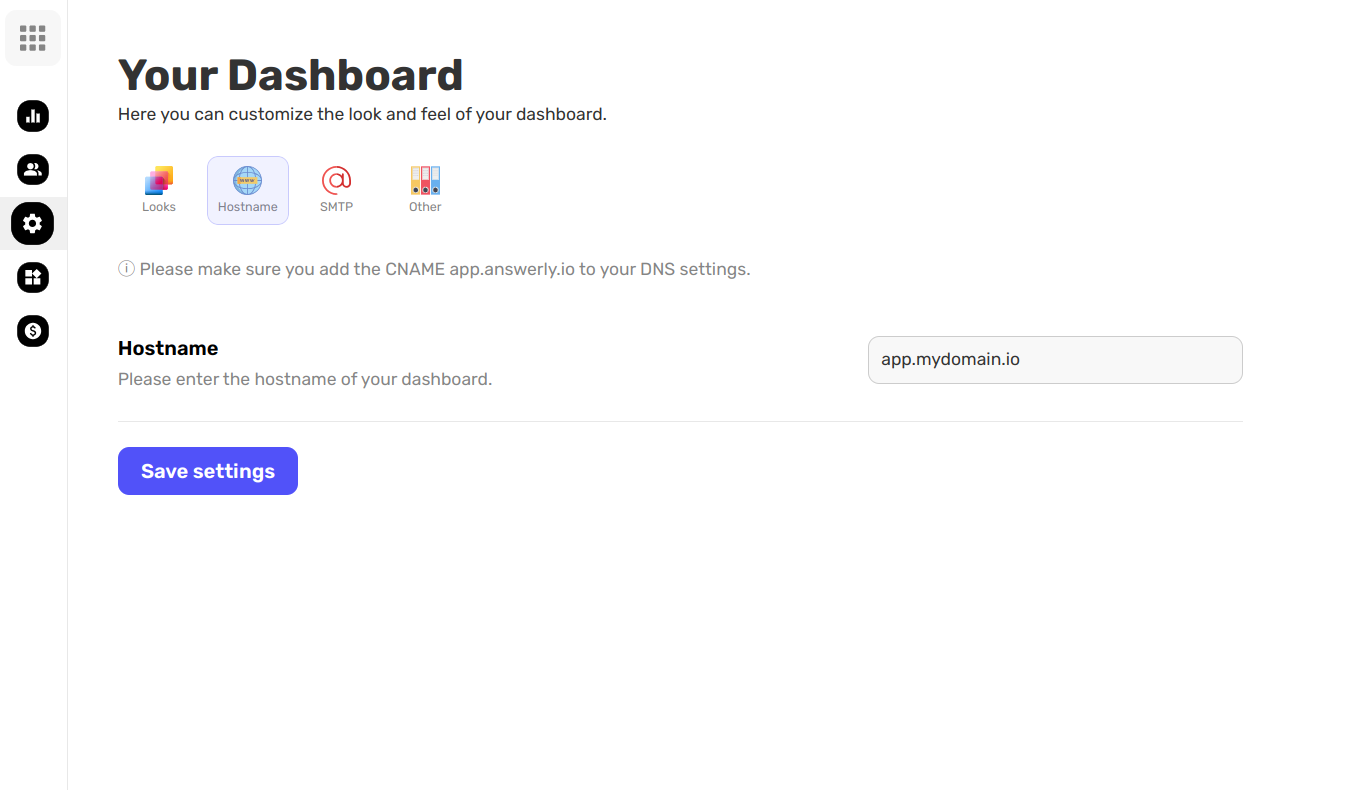
✅ Tip: Use a subdomain like app. or dashboard. instead of your root domain to avoid interfering with your main website.
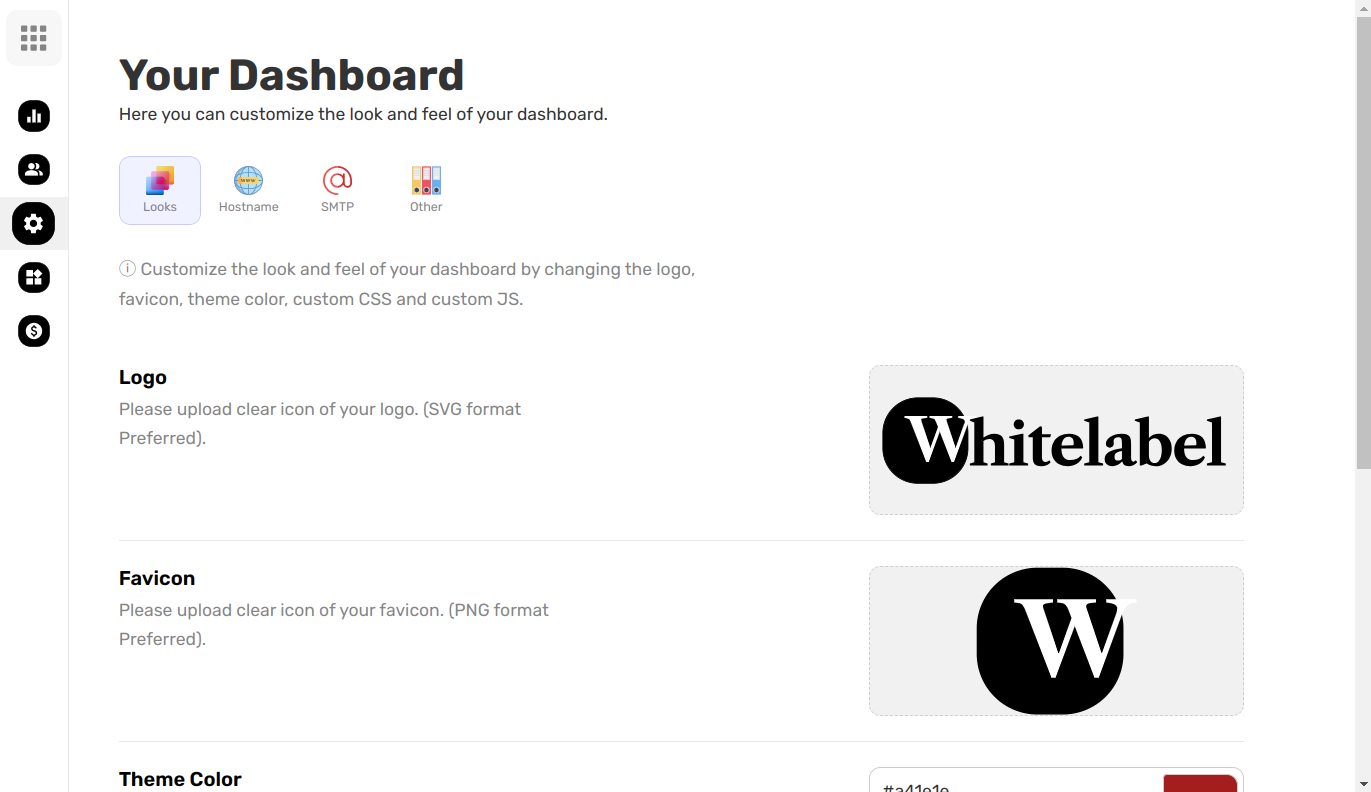
🌈 Customizing Your Global Branding (Logo, Colors, Favicon)
Make the platform truly yours by updating its visual identity:
- Logo – Shown on login, sign-up, and the navigation bar.
- Favicon – The small icon shown in browser tabs.
- Theme Color – Used across UI elements like buttons and highlights.
These options live under App Settings > Looks.
✉️ Setting Up SMTP for Emails
To send platform emails from your own domain (instead of ours), set up SMTP:
Go to App Settings > SMTP.
- From Address - The email address your clients will see as the sender. Example: hi@example.com
- Hostname - The SMTP server address you’re using to send emails. Example: smtp.example.com
- Port - The port number for your SMTP server. Typically: 587 for TLS or 465 for SSL
- Username - Your SMTP username or email account. Example: fbediu@outlook.com
- Password - The password or app-specific password for the SMTP account.
- From Name - e.g., “Your Brand”
- From Email - e.g., support@yourbrand.com
Click Save settings, then send a test email to confirm it works.
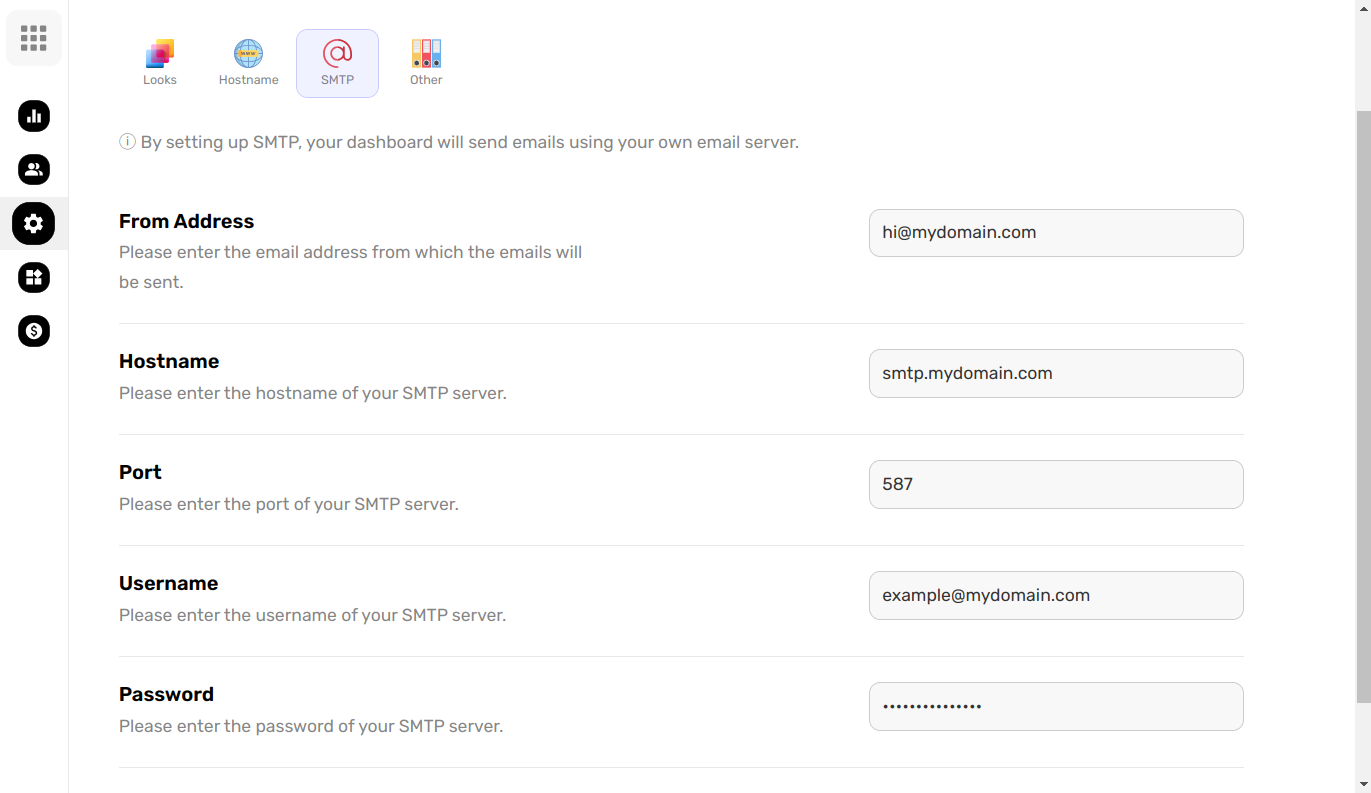
🔐 This setup ensures your emails look professional, land in inboxes, and are fully white-labeled.
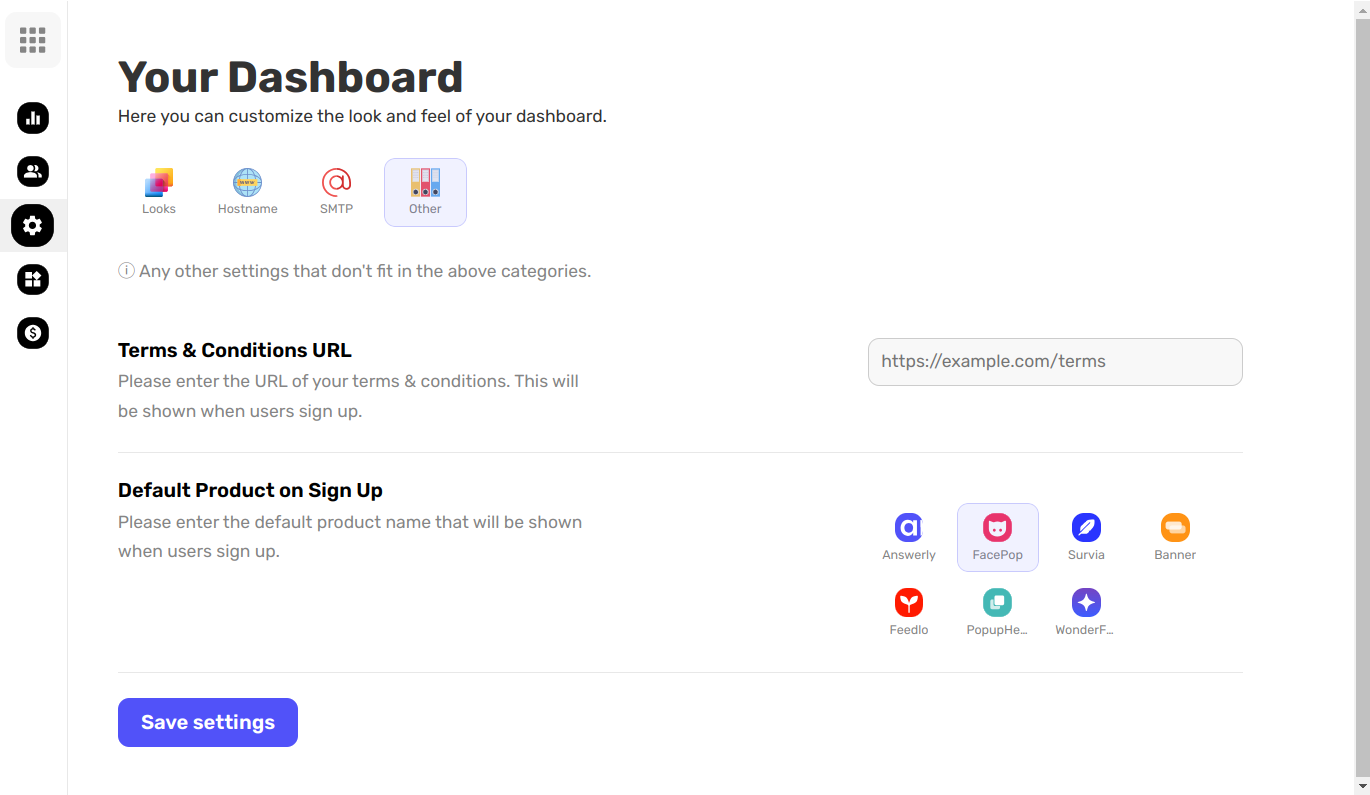
🛠 Managing General Settings
In App Settings > Other, you'll find a few important global options that don't fall under branding or email, but still help polish the user experience:
- Terms & Conditions URL - This is the link shown to users during signup. Example: https://example.com/terms. Make sure it points to your own legal page so users know what they’re agreeing to.
- Default Product on Sign Up - This is the product your new users will see first after they sign up. Example: Answerly. Useful if you want to guide clients to a specific product right away.
These settings may seem small, but they help create a complete, branded onboarding flow for your users.
Once you’ve finished setting up your app settings, you’ve laid the foundation for your whitelabel platform.
From here, you can dive into product-specific customization, build out your pricing plans, and start inviting clients to join your branded experience. 🎉
Need help with the next steps? Check out the Product Settings and Plans sections next.